The crack being the noise when I inserted the power cable into my second Connect:AMP (The AMP previously known as Sonos ZonePlayer 120) without switching the voltage switch from 110 to 230.
Luckily it turned out that I wasn't the first brain child to attempt such a power up. Rather then post my Connect:AMP back to the USA, I decided to void my warranty by replacing the fuse myself.
I ordered a minimum quantity of 10 replacement fuses from RS (http://australia.rs-online.com/web/p/products/3772203/) and then set to work disassembling the Connect:AMP by roughly following the useful Flickr stream by at0mac.
1. Firstly I peeled back the sticker on the back and removed the screws below. There are also two screws between the white and red RCA plugs which I just pulled out through the actual sticker.
2. From underneath, using a small flat head screw driver I peeled back a corner of the rubber feet and then removed the screws in each corner.
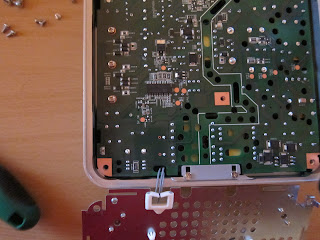
This revealed the WiFi antenna on the bottom on a backing plate.
3. I unscrewed the backing plate and carefully put the wires through the white cable holder so I could folder over the backing plate to reveal the bottom of the board.
3. Lightly reassemble the bottom - we'll need it later and remove the top cover. The top cover apparently just "pulls out", but I had quite a bit of trouble with this and ended up causing a little bit of damage to the top cover trying to leverage out the top with a flathead screw driver. I had much better success by threading a wire (or string would do) through two of the holes in a corner and pulling up with a pair of pliers.
4. This revealed the top backing plate. Remove all of the screw (including the hidden one under the warranty/shock sticker). Remove the plate.
5. I missed a photo here, but at0mac has it in his Flickr steam. At this stage you need to remove the WiFi board shown at the top of the picture.
6. This allows access to the fuse soldered onto the board (the orange-brown circle seen below).
7. This is where you might need help from a friend with soldering experience. Find matching fuse pins on the bottom of the board. Heat solder on the fuse pins and remove the fuse and install the replacement fuse.
8. Reassemble Connect:AMP.
9. Very important - Switch the voltage on the amp to 230V before connecting to power :)
If everything is done correctly, the Sonos white LED will hopefully flash while booting and you can connect with the Sonos Desktop software.
This weekend I hope to get in the roof to run some speaker cables and mount my Definitive Audio AW6500 speakers on the veranda in the the back yard. Then I'll connect them to my newly repaired Connect:AMP :)
Here's all of my equipment to install in the upcoming weeks-
2x Connect:AMP
2x Definitive AW6500 Outdoor speakers
Pair of Polk Audio RC60i ceiling speakers (Bathroom + Kitchen)
Pair of Polk Audio RC80i ceiling speakers (Bedroom)
100M of 12AWG Speakerwire (Monoprice)


